CLI¶
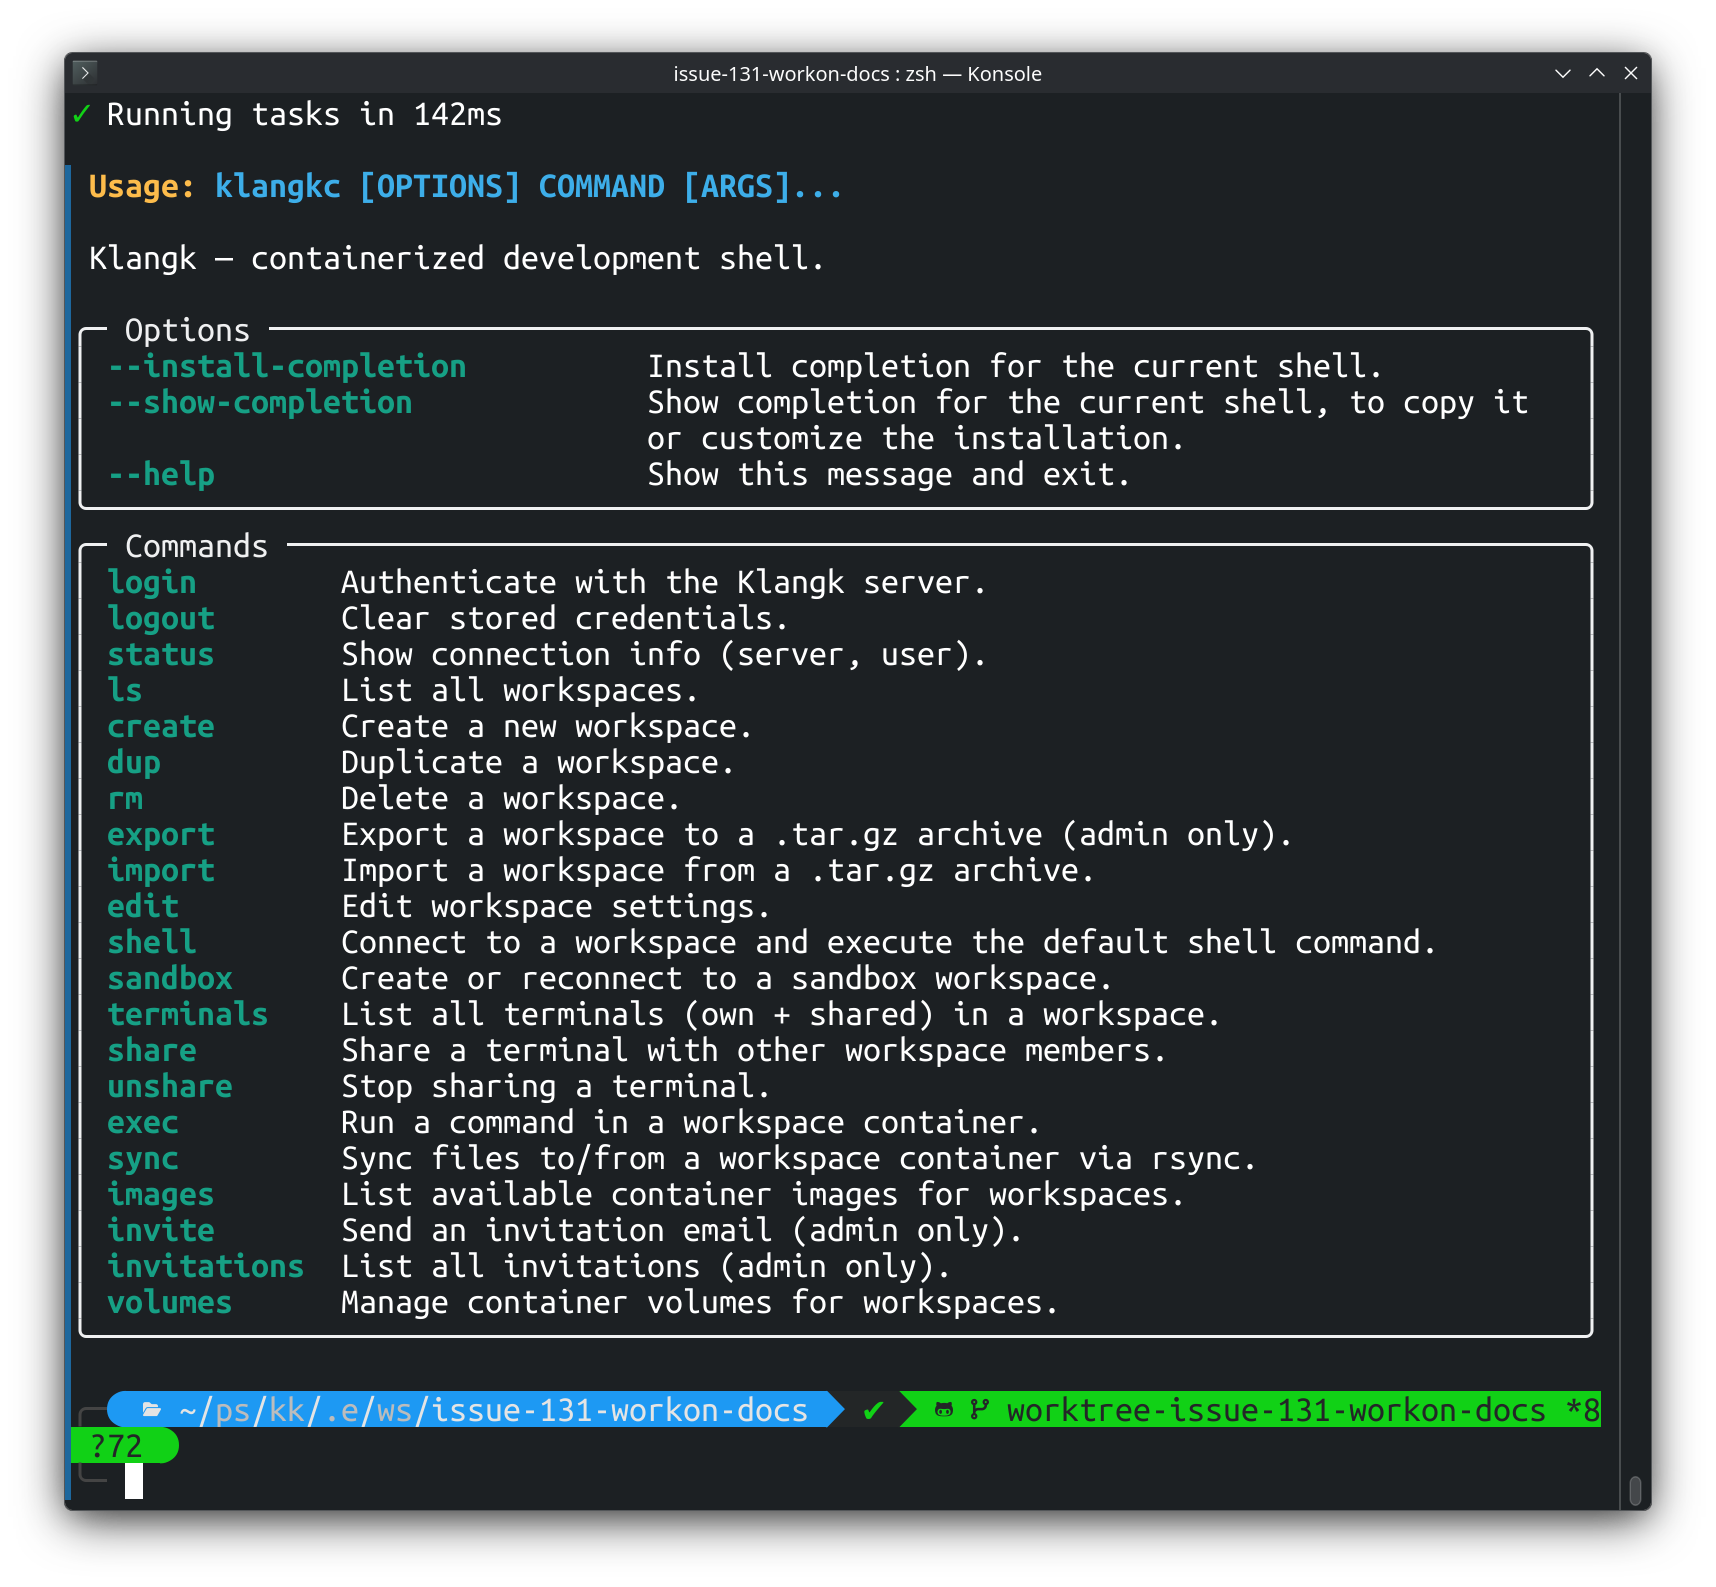
klangk is the command-line client for Klangk. It lets you manage
workspaces, connect to container shells, sync files, and administer
users from your terminal without needing the web UI. It also
supports sandboxing projects from a config
file and SSH agent forwarding
for using your local SSH keys inside containers.
Installation¶
Install klangk from PyPI:
Requires Python 3.14+.
Configuration¶
klangk uses two files, split across the XDG config and state trees:
~/.config/klangk/klangk.yaml— user-edited settings (config tree). The CLI writes this file once, on firstklangk login, then leaves it alone — after that it's yours to edit. Define server aliases, default users, and per-server overrides here.~/.local/state/klangk/klangk-state.yaml— auto-managed by the CLI (state tree). Stores authentication tokens and tracks the active server and user. Do not edit this file manually.
The split mirrors the distinction between intent (config — operator/user
edits) and disposable runtime artifacts (state — tokens the CLI can
regenerate via klangk login). The CLI's tree is klangk; the server's
(klangkd) tree is separate (~/.config/klangkd/, ~/.local/state/klangkd/)
— different audiences, different shapes.
klangk.yaml¶
# Global defaults (apply to all servers unless overridden)
forward-agent: true
ws-max-size: 33554432 # 32 MB (default 16 MB)

# Named server aliases
servers:
  local:
    url: http://localhost:8997
    user: admin@example.com # default user for login
  prod:
    url: https://klangk.example.com
    user: chris@example.com
    forward-agent: false # override global default
All fields are optional. A minimal klangk.yaml might just define one
server:
You do not need to create klangk.yaml manually. On your first
klangk login, the CLI creates one automatically using the
hostname as the alias and the login user as the default:
klangk login http://myhost:8997 admin@example.com
# Creates ~/.config/klangk/klangk.yaml with:
#   forward-agent: true   # on by default (set false to disable)
#   servers:
#     myhost:
#       url: http://myhost:8997
#       user: admin@example.com
Subsequent logins do not modify klangk.yaml — you can edit it
freely after the initial creation.
Settings¶
| Setting | Scope | Default | Description |
|---|---|---|---|
forward-agent |
global or server | true |
Forward local SSH agent into containers |
ws-max-size |
global or server | 16777216 | Maximum WebSocket message size in bytes |
user |
server only | Default user (email or handle) for klangk login |
|
url |
server only | Server URL (required for each server entry) | |
terminal-open-cmd |
global | Open TUI shell launches in a new terminal window |
Per-server settings override global settings. CLI flags override both.
Opening shells in a new terminal (terminal-open-cmd)¶
By default, selecting a terminal in the TUI suspends the TUI and runs
klangk shell in the same terminal. With terminal-open-cmd set, each
selection instead spawns klangk shell in a new terminal window via
the configured command, and the TUI stays running.
The value is the command that opens a terminal; the klangk shell
invocation is appended as trailing arguments (most terminals take the
command to run after -e / --):
# kitty
# terminal-open-cmd: kitty

# konsole — the window closes on its own when the shell disconnects
terminal-open-cmd: konsole -e

# wezterm
terminal-open-cmd: wezterm cli spawn --
Add --hold (konsole) or your terminal's equivalent only when you
want the window to remain open after the shell exits — e.g. to read
connect errors or final output. Without it the window closes itself,
which is usually what you want.
A list form is also accepted (no shell quoting to worry about):
The environment variable KLANGKC_TERMINAL_OPEN_CMD overrides the file
value (same syntax as the string form):
If the configured command cannot be executed (not installed, not
executable), the TUI shows an inline error and falls back to running the
shell in the current terminal. A command that starts but then fails on
its own (e.g. wezterm cli spawn with no wezterm GUI running) does not
trigger the fallback — prefer simple terminal -e style commands. Note
that in the string form the value is shell-split, so backslashes (as in
Windows paths) need the list form. When unset, behavior is unchanged
from before.
Exiting an external-terminal shell¶
Disconnect from the remote shell itself with the SSH-style escape —
press Enter, then ~, then . (period). Typing exit or
Ctrl+D only ends the inner shell; klangk respawns it. After the
escape the CLI prints Disconnected from <workspace>. (a following
[exited] line is tmux confirming the outer session ended — not an
error). The terminal window then closes on its own. If you configured a
holding variant (e.g. konsole --hold -e) because you want the window
to remain open — say, to read final messages — close it with the
window's normal close button when you're done.
klangk-state.yaml¶
Auto-managed. Stores the active server, active user per server, and cached authentication tokens:
active-server: http://localhost:8997
http://localhost:8997:
  active-user: admin@example.com
  users:
    admin@example.com:
      token: eyJ...
    other@example.com:
      token: eyJ...
Multiple users can be cached per server. klangk login switches
the active user and reuses a cached token if it is still valid.
No-auth (single-user) servers¶
If the server runs with KLANGKD_AUTH_MODES=none (no-login local-dev mode),
login requires no password — klangk login calls /api/v1/auth/local
and stores the freely-issued token. See Auth Modes.
In none mode you don't even need to run klangk login for each command:
register the server once with klangk login <server>, and thereafter every
protected command auto-logs in (the require_auth gate probes the server mode
and calls /auth/local). Against a password/oidc/both server the normal
"Not logged in" error still fires.
Server selection¶
Commands need a server to talk to. The active server is determined by:
--serverflag (highest priority) — pass on any command:klangk --server=prod lsactive-serverin klangk-state.yaml — set automatically byklangk login- Error — if neither is available, the CLI exits with an error message
The --server flag accepts a server alias (defined in klangk.yaml)
or a raw URL. It does not change klangk-state.yaml.
Usage¶
# Authentication
klangk login local                          # login to "local" alias (uses default user from config)
klangk login http://localhost:8997          # login with a raw URL (prompts for user)
klangk login prod chris@example.com         # login as a specific user
klangk logout                               # logout from active server
klangk logout prod                          # logout from a specific server
klangk status                               # show active server and user

# Account self-service (change password / handle / email)
klangk account show                         # show your current handle and email
klangk account passwd                       # change your password (prompts for current + new)
klangk account handle                       # change your handle (prompts for new handle + password)
klangk account email                        # change your email (prompts for new email + password)

# Non-interactive login (for scripts)
klangk login prod admin --password-file /path/to/pwfile
echo "secret" | klangk login prod admin --password-file -

# Working with a non-default server
klangk --server=prod ls                     # list workspaces on prod
klangk --server=prod shell my-project       # connect to shell on prod

# Workspaces
klangk ls                               # list workspaces (first page)
klangk ls --shared                      # include workspaces shared with you
klangk ls --limit 50                    # list up to 50 per section
klangk ls --all                         # page through every workspace
klangk ls --sort name --order asc       # sort by name, ascending
klangk ls --filter gamma                # substring filter on name
klangk create my-project                # create a workspace
klangk create my-project --auto-start   # create with auto-start on server boot
klangk create my-project --mount ~/src:/home/klangk/src          # with bind mount
klangk create my-project --mount nix-store:/nix           # with named volume
klangk create my-project --env FOO=bar                      # with env vars
klangk create my-project --health-check 'curl -sf http://localhost:8080/health'  # with a service health check
klangk create my-project --command 'npm run dev'  # with a service command
klangk create my-project -c 'npm run dev'         # short form of --command
klangk create my-project --per-handle-home       # per-member private homes (default: shared /home/klangk)
klangk create my-project --image klangk-workspace-nix        # pick a specific image (see `klangk images`)
klangk create my-project --cpu-limit 2.0 --memory-limit 4g --pids-limit 512  # per-workspace resource caps
klangk create my-project --classification-banner CUI           # per-workspace classification banner
klangk create my-project --allow github.com:443 --allow pypi.org  # with egress allowlist
klangk create my-project --idle-timeout 0        # per-workspace idle timeout (seconds; 0 = never idle out)
klangk edit my-project                  # interactive edit (name, image, command, health check, mounts, env, allowed domains)
klangk edit my-project --auto-start     # enable auto-start on server boot
klangk edit my-project --no-auto-start  # disable auto-start
klangk edit my-project --env FOO=bar    # set env var via flag
klangk edit my-project --allow github.com:443     # set allowed egress domain via flag
klangk edit my-project --shared-home             # switch layout (applies from next connect/start)
klangk edit my-project --idle-timeout 600 # set per-workspace idle timeout in seconds (0 = never idle out)
klangk dup my-project my-copy           # duplicate a workspace
klangk shell my-project                 # drop into bash inside the container
klangk shell my-project debug           # attach to the "debug" terminal window (created if it doesn't exist)
klangk sandbox myws                     # create workspace from .klangk-sandbox.yaml
klangk sandbox myws ~/projects/myapp    # specify sandbox root explicitly
klangk sandbox myws --force             # re-apply config and re-run setup on existing workspace
klangk exec my-project ls /home/klangk           # run a command in the container (login shell: sources ~/.profile)
klangk exec --raw my-project rsync --server ...      # raw argv, no shell (for transports like rsync)
klangk monitor                                        # stream all server events you can see (scoped to your workspaces) as JSON
klangk monitor --type service_health | jq .           # pretty-print health transitions for your workspaces
klangk monitor --type service_health -- sh -c '[ "$KLANGK_HEALTHY" = false ] && notify-send "klangk" "$KLANGK_HEALTH_MESSAGE"'  # alert with the failure reason
klangk consent-decide my-project     # decide a workspace's held egress requests live (egress filtering)
klangk sync ~/src my-project:/home/klangk/src      # push files to the container — needs the exec-and-sync permission
klangk sync my-project:/home/klangk/src ~/src       # pull files out of the container — needs the exec-and-sync permission
klangk sync src/ my-project:/home/klangk/src --delete --exclude '.git'  # push, deleting extras, skipping .git
klangk rm my-project                # delete a workspace
klangk stop my-project              # stop the container for a workspace
klangk start my-project             # start the container for a workspace
klangk restart my-project           # restart the container for a workspace (owner only)
klangk export my-project            # export workspace to my-project.tar.gz (owner/export permission)
klangk export my-project -o bak.tar.gz  # export to specific file
klangk import bak.tar.gz            # import workspace from archive
klangk import bak.tar.gz --name new-name  # import with a different name

# Sharing
klangk members my-project           # list workspace members by role
klangk share my-project user@x.com  # share workspace (default: coder role)
klangk share my-project user@x.com --role=spectator  # share with specific role
klangk unshare my-project user@x.com # remove a user from all roles
klangk terminal ls my-project       # list all terminals (own + shared)
klangk terminal share my-project bash        # share a terminal with workspace members
klangk terminal unshare my-project bash      # stop sharing a terminal

# Admin
klangk admin users ls                    # list all user accounts (admin only)
klangk admin users set-password user@example.com   # set/reset a password (admin only)
klangk admin invitations send user@example.com     # send an invitation email (admin only)
klangk admin invitations ls                       # list all invitations (admin only)
klangk images                       # list available container images
klangk volumes ls                   # list your podman volumes
klangk volumes create nix-store \
      --workspace <ws-id>          # create a volume owned by that workspace
                                     # (may 429 past KLANGKD_VOLUME_QUOTA_PER_WORKSPACE)
klangk volumes rm nix-store         # delete a volume (must be yours)
klangk status shows the active server, your user id/email, and whether
you hold site-wide admin privileges (derived from the server's
/my-permissions — the same source the web UI uses).
The klangk account group lets a logged-in user manage their own
credentials: klangk account show prints your current handle and email;
passwd, handle, and email prompt for the new value plus a password
confirmation (handle and email changes) or your current password (password
change). Validation matches the web UI: handles are lowercase
[a-z0-9._-]+ (≤32 chars), emails must be well-formed, and the password
minimum is read from the server (KLANGKD_MIN_PASSWORD_LENGTH, surfaced at
/api/v1/config) rather than hardcoded. After an email change the CLI
re-keys your cached token under the new address — the token's subject is
your user id, so it stays valid. See
Authentication § Account self-service.
The CLI connects to the running Klangk backend over HTTP + WebSocket — it works locally and against remote servers.
Interactive TUI¶
Run klangk with no arguments on a real terminal and it launches an
interactive TUI (in non-TTY contexts — pipes, CI — it prints help
instead, so the command stays scriptable). The TUI is the same client
as the subcommands, driving the server over HTTP + WebSocket:
- workspace list (owned + shared) with inline filter (
/) and sort cycling (o) nnew workspace,iimport,eedit — the create/edit forms cover every workspace option (image, service command, health check, mounts, env, allowed domains, egress mode, resource caps)- per-row actions on the highlighted workspace:
rrestart,sstop/start,uduplicate,ddelete cswitch server,llogout?key cheatsheet
The consent popup for interactive-mode egress filtering also lives in
the TUI/klangk shell wrapper (see
Egress Filtering).
Exiting the shell¶
To disconnect from klangk shell, use the SSH-style escape sequence:
Enter, ~, . (three keystrokes in sequence).
- Press Enter to make sure you're at the beginning of a new line. The escape sequence is only recognized immediately after a newline.
- Press ~ (tilde). Nothing visible happens yet — the CLI is waiting to see if the next character completes the escape.
- Press . (period). The connection closes immediately and you're returned to your local shell.
If you type ~ and then any key other than ., the tilde and that key are both sent to the remote shell as normal input. This means ~ only has special meaning right after Enter — you can use tildes freely in commands and text without triggering the escape.
Note: Closing your terminal window or pressing Ctrl+C will also end the session, but the escape sequence is the clean way to disconnect without interrupting a running process inside the container.
Named terminal windows¶
klangk shell accepts an optional terminal name argument to connect to
a specific terminal window inside the workspace:
klangk shell my-project build    # attach to the "build" window
klangk shell my-project logs     # attach to the "logs" window
If the named window doesn't exist, it is created automatically. This lets you open multiple named terminals from the CLI without using the web UI. The new window also appears as a tab in the web UI for anyone viewing the workspace.
Without a terminal name, klangk shell connects to the currently
active window.
Terminal behavior differences¶
klangk shell provides the same tmux-based terminal as the web frontend, but clipboard behavior differs:
- Web frontend: Text selections auto-copy to the system clipboard via the browser bridge. Mouse wheel scrolls through scrollback. No extra setup needed.
- CLI (
klangk shell): Text selections auto-copy to the system clipboard via OSC 52, which requires your terminal emulator to support it. The container's tmux emits the escape to the attached client and it is carried over the WebSocket to your terminal — including inside the consent-popup wrapper (the local wrapper tmux re-emits it) and in external terminals opened viaKLANGKC_TERMINAL_OPEN_CMD. Mouse wheel scrollback works. Native text selection (viewport-only) is available via Shift+drag.
OSC 52 terminal support¶
The following terminal emulators support OSC 52 clipboard integration (auto-copy from tmux selections will work):
| Terminal | OSC 52 support |
|---|---|
| iTerm2 | Yes |
| kitty | Yes |
| alacritty | Yes |
| WezTerm | Yes |
| foot | Yes |
| Windows Terminal | Yes |
| Konsole | Yes (22.04+) |
| xterm | Yes |
| GNOME Terminal | No |
| Tilix | No |
| MATE Terminal | No |
| Terminator | No |
If your terminal does not support OSC 52, tmux selections will still be captured in the tmux paste buffer but will not automatically appear on your system clipboard. Consider switching to a terminal emulator that supports OSC 52 for the best klangk shell experience.